

Pass the pre-trip section by moving through seven fixed zones in order: safe start, engine compartment, front of vehicle, driver’s side, trailer coupling, trailer body, rear, then back in-cab for the air brake checks. Every item you touch needs two things said aloud: what it is, and why it matters for safety. That structure, not raw memorisation, is what examiners are actually grading.
The must-mention safety-critical items for a Class A combination are:
- Belts, hoses and visible fluid leaks under the engine
- Fluid levels: oil, coolant, power steering, washer
- Steering box, linkage and tie rods, checked for play and secure mounting
- Tyre tread, sidewall condition and inflation on every axle, tractor and trailer
- Lights, reflectors and lenses, correct colour and securely mounted
- Fifth wheel, kingpin, locking jaws and glad hand connections
- Full air brake system, including the four-part test
Dica profissional: Walk the exact same physical path every single practice session, driver’s door, engine, front, driver’s side, coupling, trailer, rear, in cab. Your body will remember the order even when nerves wipe your memory of the words.
Principais conclusões
Passing the CDL Class A pre-trip inspection depends on memorising a fixed seven-zone walking order and narrating two points aloud for every item you touch.
| Ponto | Detalhes |
|---|---|
| Fixed inspection path | Walk the same physical route every practice session to build automatic recall under pressure. |
| Touch, name, explain | Point to or touch each item, name it, and state two facts about its condition. |
| Air brake script | Rehearse the four-part test separately until the psi figures come out identical every run. |
| Coupling gets extra scrutiny | Fifth wheel and locking jaw checks carry some of the highest automatic-fail risk. |
| Practice volume matters | A full Class A pre-trip covers roughly 50 to 70 individual items across every zone. |
For fleet operators managing multiple drivers through recurring inspection routines, tools like maintenance software built for industrial fleets can help formalise pre-trip records and preventive maintenance scheduling once drivers are licensed and on the road.
Índice
- What does the examiner expect during the pre-trip inspection?
- How do you check the engine compartment for the exam?
- How do you inspect the steering system on a Class A truck?
- What’s the correct way to check wheels and tyres?
- How does the air brake test work step by step?
- How do you check the coupling and connections?
- What does the examiner check on the trailer itself?
- What happens during the in-cab and brake check sequence?
- What mistakes make candidates fail their pre-trip most often?
- How should you structure your practice checklist?
- What instructors notice about pass and fail candidates
- Where can you find official study resources?
- Sources
- FAQ
What does the examiner expect during the pre-trip inspection?
Every item on the CDL vehicle inspection checklist has to be pointed to or physically touched, named correctly, and explained with two points about its condition or purpose. Say “belt” while gesturing vaguely and you get nothing. Touch the belt, say “alternator belt, checking for cracks and proper tension,” and you get full credit.
Examiners will not require you to crawl underneath the vehicle, but they will fail you fast for certain defects. Automatic or near-automatic fail conditions include:
- An insecurely mounted or improperly locked fifth wheel
- Missing safety equipment (triangles, fire extinguisher, spare fuses if required)
- Major fluid leaks under the engine or transmission
- Visible steering looseness or missing cotter pins
- Bald tyres, exposed cords, or fewer than the legal minimum lug nuts
Bring your CDL permit, any required documentation, and glasses or corrective lenses if you use them. A full pre-trip inspection at the test usually runs several minutes once you’re fluent in the script. Most jurisdictions allow you to bring a personal, unmarked checklist for reference, but you’re expected to work through it from memory. Official rules requiring pre-trip inspections before every trip trace back to federal regulation, so examiners treat this as more than an exam formality.
Dica profissional: Practise saying your two points per item out loud, not in your head. Silent rehearsal feels fluent; spoken rehearsal exposes the gaps.
How do you check the engine compartment for the exam?
Before you open the bonnet, state your safe-start reminder: parking brake set, wheels chocked if required, transmission in neutral. Then walk the front of the engine and do a visual sweep underneath for fresh leaks before touching anything.
Work through the compartment in this order:
- Check the oil level against the dipstick markings
- Check coolant level in the reservoir, not the radiator cap itself
- Check power steering fluid level and look for residue around the reservoir
- Inspect belts for cracking, fraying, and correct tension
- Inspect hoses for bulges, soft spots, or leaks at the clamps
- Check the alternator and wiring for secure mounting and no exposed wire
- Check the water pump for leaks or play
- Confirm the air compressor is securely mounted with no leaks at the fittings
Example phrasing for the examiner:
- “Oil level, checking it’s between the marks and the oil isn’t dirty or milky.”
- “Alternator belt, checking for tension and cracking.”
- “Power steering reservoir, checking fluid level and looking for leaks around the cap.”
Training checklists often use the mnemonic “leaks, leans and lights” for the external walkaround steps, and it works just as well as a mental anchor here.
How do you inspect the steering system on a Class A truck?
Examiners look closely at the steering box, pitman arm, drag link and tie rod ends because a loose steering component is one of the fastest routes to failure. Touch each mounting point and state whether it’s secure, then check for any missing or damaged cotter pins and bolts.
Inspect and describe:
- Steering box mounting: no cracks, no leaks, bolts tight
- Pitman arm and drag link: secure connection, no excessive movement
- Tie rod ends: secure, cotter pins in place, no visible wear
To demonstrate play, grip the steering wheel and move it slightly while saying, “checking for excessive play in the steering wheel, should be no more than the specified amount before the front wheels respond.” You’re not expected to measure it precisely on the test, just show you know what excessive movement looks like.
Dica profissional: If you spot actual looseness during practice, don’t dismiss it as “probably fine.” Steering defects are one of the more common automatic fail triggers, and examiners are trained to watch your hands closely here.
What’s the correct way to check wheels and tyres?
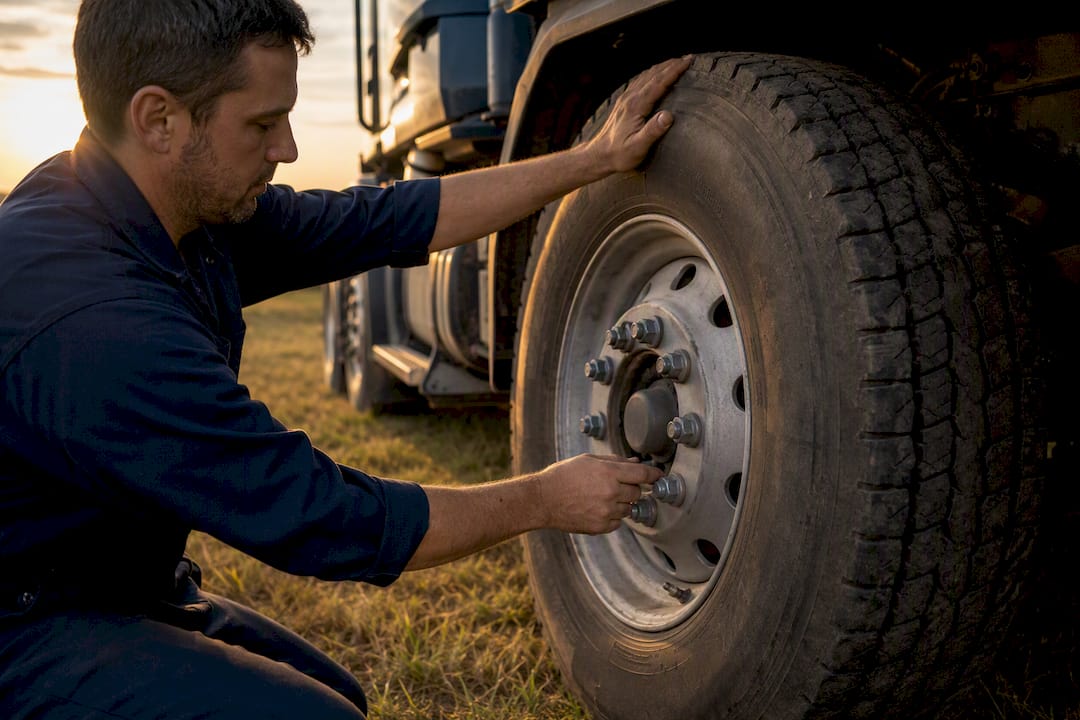
Every wheel position, tractor steer axles, drive axles, and every trailer axle, gets the same three-step check: tread depth, tyre condition, and inflation. Say it in that order every time so the rhythm becomes automatic.
| Check | O que procurar | What to say |
|---|---|---|
| Tread depth | No excessive or uneven wear | “Checking tread depth, no less than the legal minimum” |
| Sidewall condition | No cuts, bulges, or exposed cords | “Checking sidewall for cuts and bulges” |
| Inflation | Correct pressure, valve stem and cap present | “Checking inflation and valve stem condition” |
Steer tyres commonly require a minimum tread depth of 4/32 of an inch, with other positions typically allowed down to 2/32, though exact thresholds vary by jurisdiction, so confirm the standard your test uses. State the number when you check it rather than eyeballing it silently.
For the hub itself, touch the lug nuts and say, “checking for missing, loose, or rusted lug nuts,” then check the rim for cracks or bends and confirm the valve stem has its cap. Rust trails from a lug nut usually mean it’s been loose for a while, worth flagging even in practice.
How does the air brake test work step by step?
O four-part air brake test is the section that trips up more candidates than any other, mostly because it’s the longest sequence to memorise. Break it into four distinct stages and narrate each one.
- Build air pressure and check the governor cut-out. Start the engine and let air pressure build. The governor should cut out around a typical high air pressure range, stopping the compressor from over-pressurising the system.
- Run the applied-leak test. With the engine off and a full air tank, hold the brake pedal down for one minute. Air loss should not exceed roughly 3 to 4 psi per minute for a combination vehicle.
- Confirm the low-air warning activates. With the engine off, fan the brakes to bleed pressure down. The warning buzzer or light should trigger before the gauge drops below a typical mid-range psi level.
- Watch for spring brake pop-out. Continue bleeding air. The parking brake valves should pop out automatically within a common low pressure psi range, applying the spring brakes before pressure drops to a dangerous level.
For the parking, trailer and service brake checks, apply each one in turn and describe what should happen: the truck should not roll when you gently attempt to pull against the set parking brake, and the trailer brake (when pulled) should hold the trailer alone.
Dica profissional: Never rely on memory alone for the psi figures. Say the range, not a single number, “somewhere between 20 and 45 psi,” because that’s genuinely how the spec is written and it protects you if your reading falls anywhere in that band.
How do you check the coupling and connections?
Coupling checks are unique to Class A combinations, and examiners scrutinise them hard because a failed coupling is the single most dangerous defect on the test. Walk to the fifth wheel and physically point to the locking jaws.
- Fifth wheel: check for adequate grease, secure mounting bolts, and confirm the locking jaws are fully closed around the kingpin with the release arm in the locked position.
- Glad hands: check that service and emergency lines are securely connected, not crossed, with no chafing along the hose length.
- Electrical connection: confirm the seven-way plug is fully seated and locked, with no exposed wiring.
- Slack and routing: check that air and electrical lines have enough slack for a full turn without stretching or dragging.
Say something like: “Locking jaws, checking they’re fully closed around the kingpin with no gap, and the release arm is in the locked position, not the release position.” That single sentence usually covers the two points examiners want to hear.
What does the examiner check on the trailer itself?
Beyond coupling, the trailer body gets its own pass. Landing gear, lights, doors and structural condition all matter here, and skipping this section entirely is a common reason candidates lose points late in the test.
- Landing gear: confirm it’s fully raised, the crank handle is stowed securely, and neither leg is bent or cracked.
- Lights and reflectors: check that marker lights, brake lights, and turn signals work and show the correct colour, amber to the front and side, red to the rear. Have someone press the brake pedal or use a test tool while you observe.
- Doors and latches: check hinges are intact, latches close securely, and reflective tape is present and undamaged.
- Frame and cargo securement: check for cracks, rust-through, or damage along the frame rails, and confirm straps or chains are properly tensioned if cargo is visible.
Faded or peeling reflective tape is an easy defect to miss during a rushed walkaround. If your training yard has older trailers, a quick detailing pass on lenses and reflectors can make genuine defects far easier to spot during practice.
What happens during the in-cab and brake check sequence?
Before you even turn the key, run through the safe-start routine: seat belt fastened, parking brake set, trailer brake (if fitted) applied, transmission in neutral. Turn the ignition to the “on” position without starting and check that the ABS and low air warning lights illuminate, confirming the bulbs work, then start the engine and watch them extinguish.
Once running, name each gauge and state what a healthy reading looks like:
- Oil pressure: should rise and stabilise within the normal range shortly after start
- Coolant temperature: should read cold to normal, never immediately spiking
- Ammeter or voltmeter: should show a positive charge, not a discharge
- Air pressure gauges: should climb steadily toward the governor cut-out
For the final service brake test, tell the examiner what you’re about to do before you do it: “I’m going to move the vehicle forward at approximately five miles per hour and apply the brakes to check for pulling or unusual noise.” A straight, controlled stop with no pulling to one side earns the credit here.
What mistakes make candidates fail their pre-trip most often?
The same handful of errors account for most failed pre-trips. Recognising them in advance is often the difference between a pass and a retest.
- Skipping an item entirely because it felt “obvious” or was rushed under pressure
- Reciting the air loss limits incorrectly or in the wrong order
- Pointing vaguely instead of physically touching the component
- Naming an item without stating two points about its condition
- Missing a loose or rusted lug nut during the wheel check
- Describing the coupling incorrectly, especially the locking jaw position
Fix each one with short, repeated drills rather than one long rehearsal. Practise the air brake sequence alone, five times in a row, until the numbers come out identical every time. If you discover a genuine fail-level defect (a real fluid leak, a cracked frame) just before your test, disclose it and reschedule rather than risk being marked down for something the examiner will find anyway.
Dica profissional: Record yourself doing a full walkaround on your phone once a week. Watching it back exposes the vague gestures and mumbled phrases that feel fine in the moment but read as incomplete on the day.
How should you structure your practice checklist?
Build your study sheet around the same seven zones examiners use: engine compartment, cab and controls, air brakes, driver’s side, front, passenger side, and rear plus coupling. Each zone typically holds somewhere between three and seven sub-items, and a full Class A pre-trip commonly covers 50 to 70 individual points once every zone and axle is counted.
Three drills build the muscle memory fastest:
- Timed walkarounds. Run the full sequence against a stopwatch until you land consistently in the 12 to 20 minute range.
- Partner examiner scripts. Have someone else hold your checklist and interrupt you, “what does that do?”, to simulate real exam pressure.
- Repetition blocks. Run the air brake section alone, ten times over a week, separate from the full walkaround.
You’re generally permitted to bring a clean, unmarked checklist into the exam room for reference, but examiners expect you to work almost entirely from memory. A sheet covered in notes or highlighting usually isn’t allowed, so keep your actual study version separate from anything you might carry in.
What instructors notice about pass and fail candidates
Confidence reads clearly to examiners, and it’s not about bravado. It’s about moving through the same order every time without pausing to remember what’s next. Candidates who hesitate between zones almost always lose more points than candidates who make a small verbal slip but keep moving.
The air brake script and coupling checks deserve the most rehearsal time, not because they’re inherently harder, but because they carry the most sequential steps to forget under pressure. Everything else is largely repetition of the same three-part pattern: touch, name, two points.
Master the air test cold, keep your phrases short and identical every time, and never let a hesitation on one item bleed into the next.
Where can you find official study resources?
Several official and training sources back the checklist above and are worth downloading directly before test day.
- Your state’s own commercial driver’s manual, which sets the exact scoring rules your examiner will follow
- Federal guidance under 49 CFR § 396.13 on pre-trip inspection requirements
- Free printable pre-trip checklists from training providers, useful for building your own study sheet
- Instructor-led video demonstrations, which help you match spoken phrasing to physical movement
Always confirm jurisdiction-specific figures, like exact tread depth minimums, against your own state DMV page, since small variations exist between states.
Sources
- 2026 Pre Trip Inspection Checklist PDF | Free Download + CDL Steps
- New York State Commercial Driver’s Manual Pre‑Trip Vehicle Inspection Test, Basic Vehicle Control Skills Test, On‑Road Driving Test
- Pre‑Trip Checklist Answer Key (Rev. 7.5 — Jan 2026)
- Class A CDL Pre‑Trip Inspection Simplified
FAQ
What are the seven steps for a pre-trip inspection?
The seven zones are engine compartment, cab and controls, front of vehicle, driver’s side, coupling system, trailer, and rear, inspected in a fixed order to build memorisation and consistency during the exam.
Where can I find a pre-trip checklist template?
State DMV commercial driver manuals and CDL training providers publish free printable checklists that mirror official scoring criteria, and these make the most reliable study base since they reflect actual test standards.
What items are required to be checked during a pre-trip inspection?
Required items include fluid levels, belts and hoses, steering components, tyres and wheels on every axle, lights and reflectors, the coupling system, and the full air brake system, each demonstrated with a touch and two spoken points.
Is there a free app or download for CDL pre-trip inspections?
Several training providers offer free downloadable checklist PDFs and video walkthroughs rather than dedicated apps, and these work well as printable study sheets alongside timed practice drills.
How long does the pre-trip inspection portion of the exam usually take?
Most candidates complete the full pre-trip inspection in 12 to 20 minutes once they’re fluent in the script, though pace varies depending on how many items the examiner asks about.
Recomendado
- Pre-trip inspection for Class B vehicles: UK compliance guide – FullyOps
- Inspection checklist for equipment: 2026 industrial guide
- Visual inspection: a practical NDT guide for maintenance managers
- Lista de verificação de conformidade de manutenção para sucesso industrial